Joomla extensions can be plugins, modules, components and templates. Usual extensions installed are templates, better html editors and fancy menu's. Go to extensions.joomla.org and download extension that you want as zip file onto your local hard disk drive. From admin web interface go to Extensions/Install-Uninstall in Upload Package File section click Browse button, search for extension zip file on your local drive then click on 'Upload File and Install'.
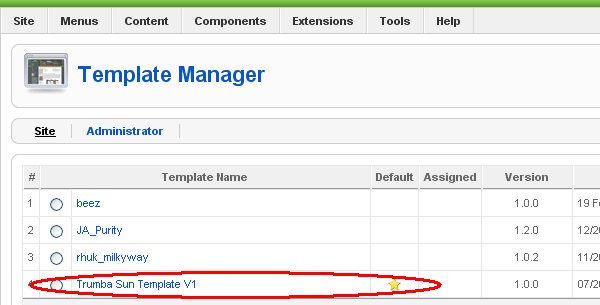
Get free template at SiteGround or at JoomlaOS and download template as zip file and install it as extension (see above). To change your website look & feel set new template as default: go to Extensions/Template Manager and set template that you wish to use as default: select template, click on yellow star in toolbar and default template should be marked with little yellow star.
Joomla Blog is the page (or menu item) with so called blog category layout which displays all articles from one category.
To create blog page you must define at least one section and one category, then create menu item with category blog type and link with your newly created category. When you write article or new blog post, just assign article to the created section and category and article will appear automatically on your blog page. Inside menu item of blog type you can customize maximum number of blog entries per page and layout of pages (number of columns, positions of blog entries, etc). When writing articles or blog posts in this case, you can use ReadMore function to post only teaser or intro text of your blog post on your blog page so you can have more blog entries per page. ReadMore link will appear and visitor can read entire article on separate page.
Step by step example:
Step1: go to Content/Section and create new section named 'MyBlogs'.
Step2: from Content/Category create category 'Travels' under section 'MyBlogs'.
Step3: create article inside category 'Travels' from Content/Article Manager.
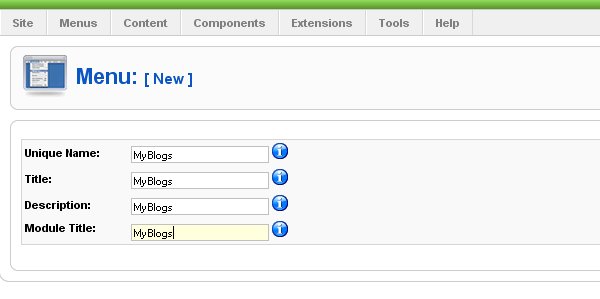
Step4: go to Menus/Menu Manager and create menu 'MyBlogs'.
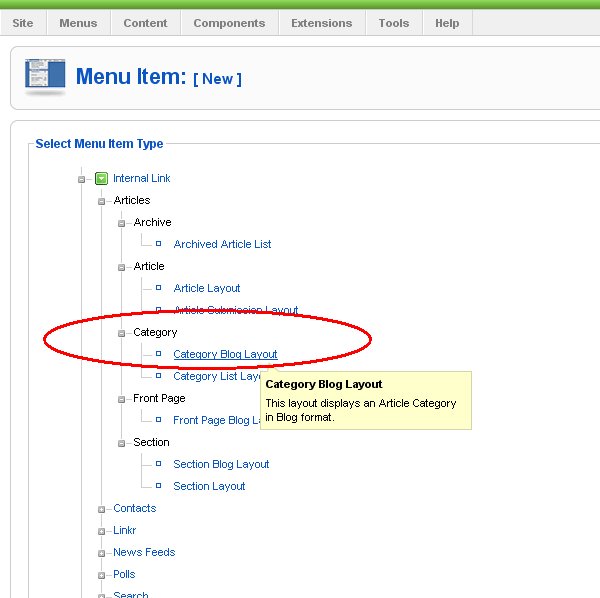
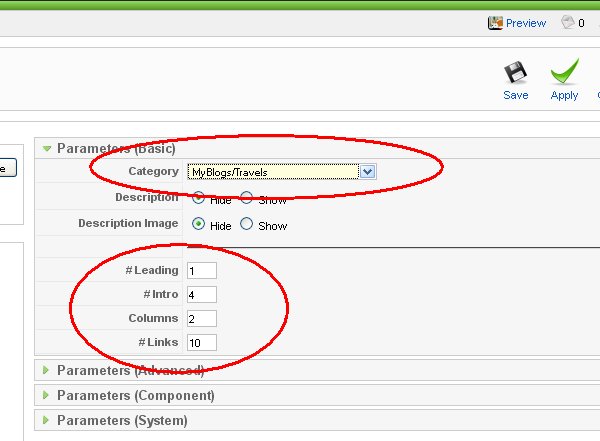
Step5: from dropdown list from Menus select 'MyBlogs' menu and create menu item 'Travels', select Category Blog Type.
Step6: assign menu item to the section/category of MyBlogs/Travels type and customize layout of blog page (columns=2, blog posts per page (links)=10, etc..).
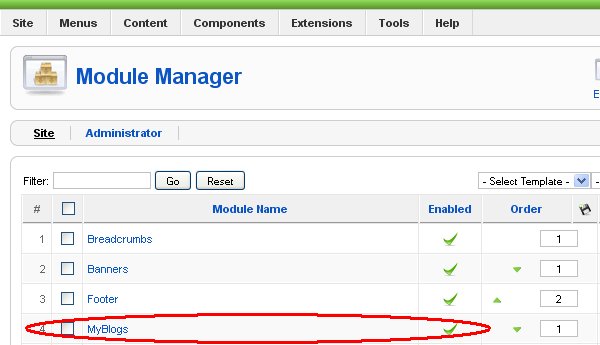
Step7: to finally publish your blog page, go to Extensions/Modules and enable module 'MyBlogs'.
Article can be written directly online through the admin interface (usually admin log-in page is in sub directory /administrator of the Joomla installation directory e.g. http://mysite.com/administrator/) in section Content/Article Manager -> New. Second method is to create and publish menu item with Article Sumbission Layout and to login as regular user through Login Module.
You can use already installed TinyMCE WYSIWYG (What You See Is What You Get) HTML editor or you can install better editors (see list of available HTML editors) as extensions (see how to install extensions and templates). This is very convenient as it allows you to publish your article or new blog entry from anywhere in world where internet access is available.
For other freaks (like me) there is a option to switch-off WYSIWYG HTML editor and put raw HTML code (see how to use different HTML editors in Joomla), so you can write your articles offline in your favorite HTML editor, copy HTML code and paste it as raw HTML inside article. More then one HTML editor can be installed on the Joomla and every user can use it's own editor.
New articles can be left as 'Uncategorized', but if you plan to put series of articles in one page layout (blog) you must use sections and categories. I recommend to use sections and categories to organize your articles, because later on you can easily search articles. Each section can contain one or more category which you can organize in some logical way (e.g. you can define section PC Hardware and category Reviews).
Article can contain some special Joomla system tags such as PageBreak and ReadMore tag (see buttons at bottom of article HTML editors in Content/Article Manager/New page) thus allowing you to split long article on more then one page or to use ReadMore feature to only post teaser (intro text) on front page and to allow user to read whole article on separate page (this is most common way to post articles on front page or on blog pages).
How to create article in Joomla
Login as admin in /administrator sub-path of your site or location where you installed Joomla e.g. http://your_domain_name.com/administrator
Go to Content/Article Manager, click New, write article, in Section select 'Uncategorised' press 'Save'
When working on long articles I recommend to frequently use 'Apply' button to save changes as you never know when session can timeout or when your brand new Chinese computer will turn off for no reason.
First to clear some things: Front Page is NOT same as Home page:
In Joomla Home page is menu item that has default check box set in Menus/Menu Item manager. It can be only one menu item defined as default (home page), and in Menus dropdown list, menu that contains default menu item is marked with star.
Front Page is special front page layout (that can contain multiple articles) that can be assigned to any menu item and it is usually default menu item but it's not rule. So any article that contains Front Page enabled will automatically appear in the menu item which is defined with Front Page layout. By default Joomla comes with Home menu item declared as default (home page) of front page layout.
How to define custom home page
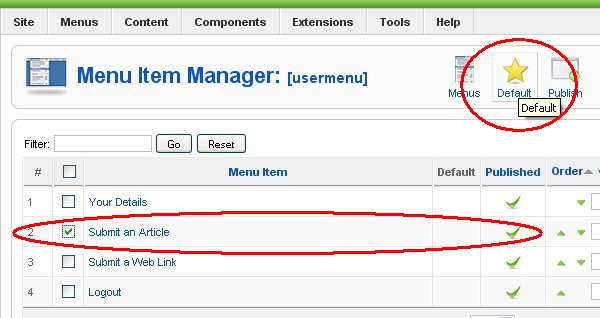
Step1: From Menus dropdown list select menu and inside Menu Item Manager select menu item that you wish to declare as Home page and click on big yellow star (Default).
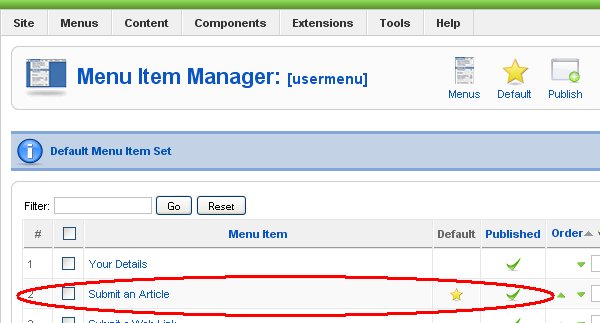
Step2: For example 'Submit A Article' from 'usermenu' is now declared as default (home page). You can see small yellow star beside menu item name.
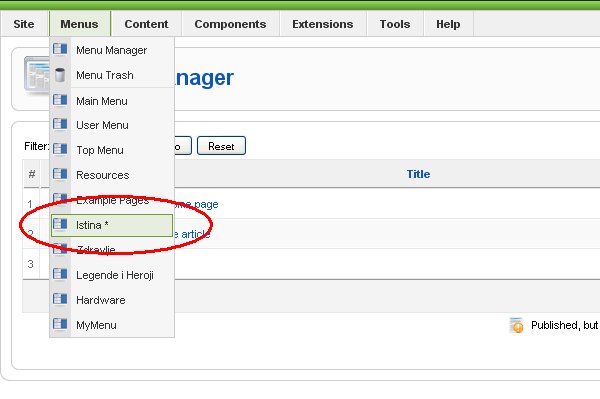
Step3: When you inspect dropdown list that appear when you click on Menus, you will see a little star near name of menu which contains default menu item, in our case 'usermenu'.
In Joomla Admin interface there is 'Published' check box in few different places (Article Manager, Menu Item Manager) that can confuse new users into making them thinking that article or menu (with menu items) is somehow automatically published/visible on the website if this check-box is checked, but this is not true. So let us see how can we actually publish our article. Article can be published on your site in two ways:
1. Directly on the front/home page (if default menu item is of the front page layout type which is default)
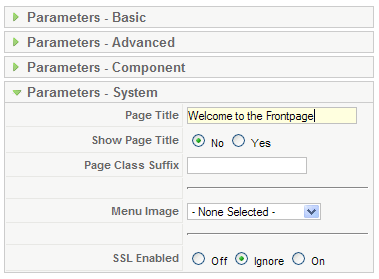
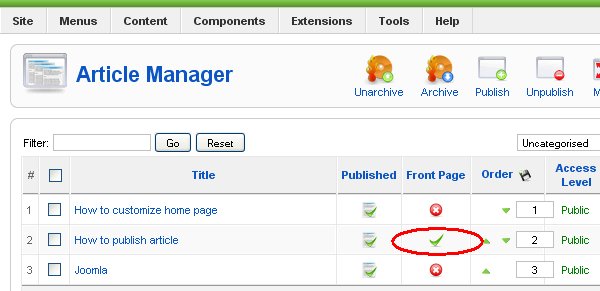
Once created, you can publish article directly on Front Page by checking 'Front Page' 'Yes' in the Article HTML editor form or icon FrontPage in Article Manger list (see pictures). That's it. 'Published' check-box is only used to hide or 'unpublish' visible article from website (from menu, category or from front page).
Way 1: Publish the Article on the Front Page in the Article edit window by checking 'Yes' Front Page radio button.
Way 2: Publish the Article on the Front Page by checking Front Page article icon in the Article Manager.
2. Article can be published by connecting article to the menu item of the menu
Create menu and appropriate menu item with Article Layout type and assign Article that you wish to publish. Go to Extensions/Modules, search module named as your Menu, then press Enable, that's it! Let's go step by step on how to create menu with one menu item of the single Article layout type:
Step1: create article, set published: 'yes' and front page: 'no', see instructions on how to create article.
Step2: open Menu manager from Menus/Menu manager.
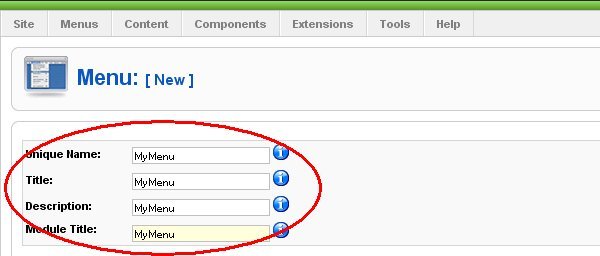
Step3: click 'New' and create Menu called 'MyMenu'.
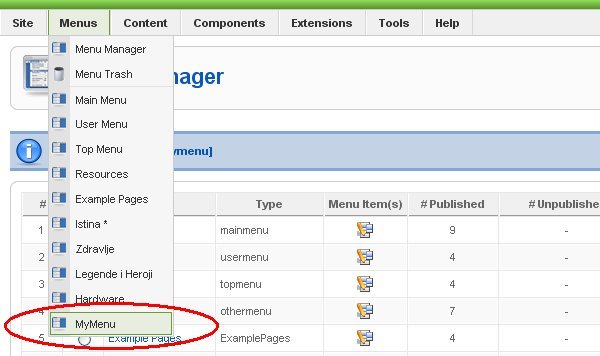
Step4: in Menus dropdown list 'MyMenu' entry should be visible, click on it to open Menu Item Manager window.
Step5: click on 'New' button from Menu Item Manager to create new menu item.
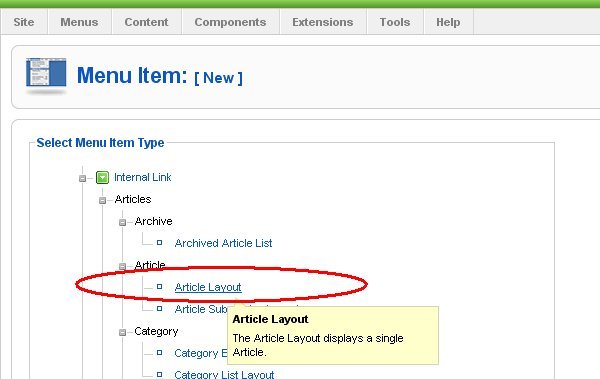
Step4: window with all possible layouts for new menu item should appear, select Internal/Article/Article Layout.
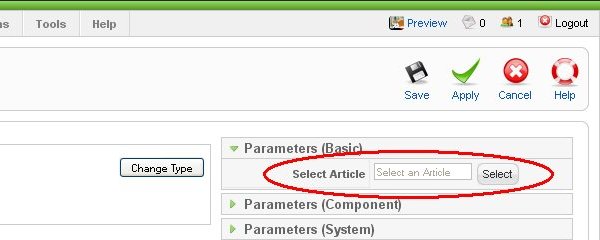
Step6: In Menu item editor, enter name of your menu item, let's called it 'MyItem', you can leave all fields at default values, but you must select which article you wish to assign to this menu item, so chose previously created article and save menu item.
Step7: From main menu in administrator interface select Extensions/Module Manager, you should see 'MyMenu' module in list (if you don't see it at first try to browse to the next page). By default, new module that is assigned to your 'MyMenu' is disabled. Now to publish (or better said: to make it visible on your website) your entire menu with menu item and article just select 'MyMenu' module and click 'Enable' (by default, all new moduels/menus are disabled).
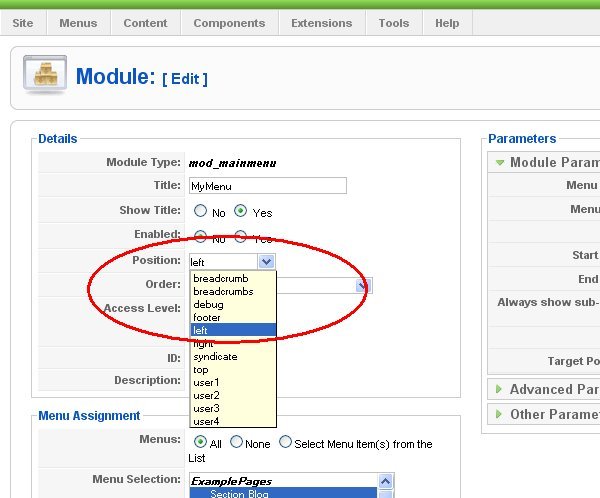
Step 8: If you wish to customize on which position menu will appear within your website menu layout, edit module 'MyMenu' and set position you desire (left is default).
That's it, if you are lucky you should see your article on your website!.